Requirements
- Windows, MacOS, Linux
- Blender 3.3 LTS - Blender 3.4 (stable)
Experimental Builds
Experimental Blender builds such as 3.5-alpha are not supported, and fixing any issues related to them, will not be a priority, but reporting them is still encouraged.
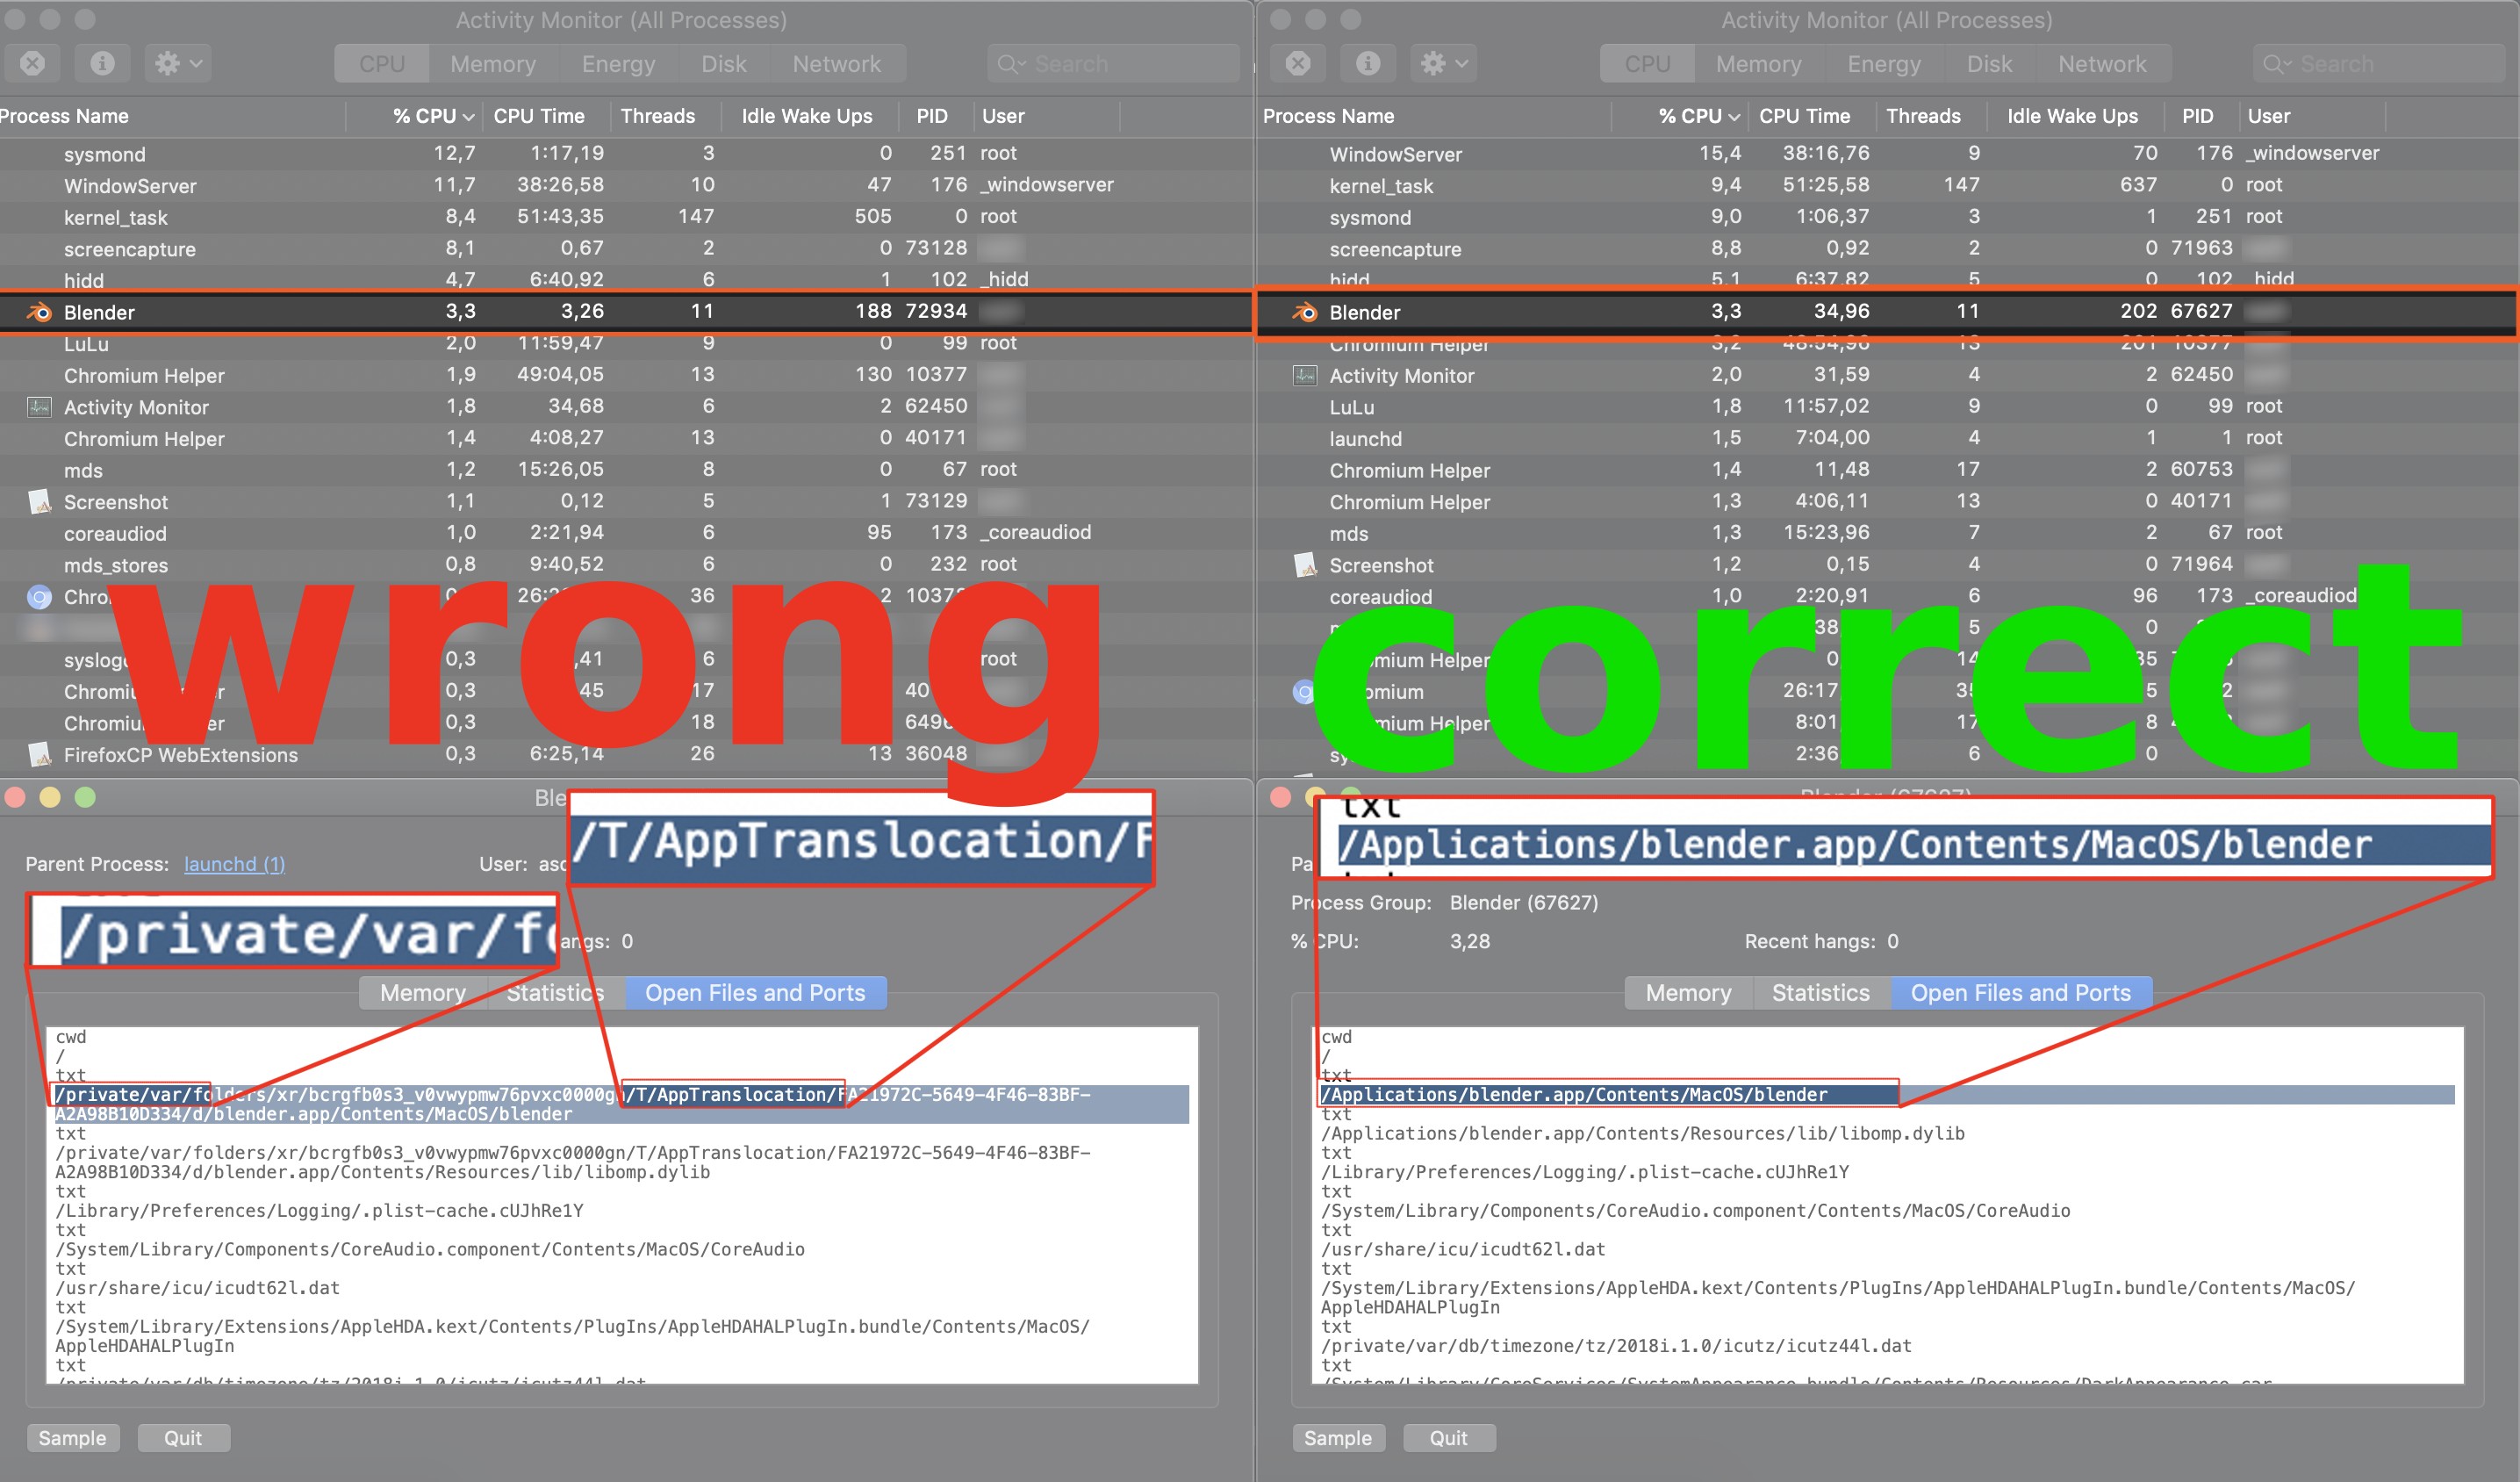
Blender on MacOS
MacOS users should install Blender properly, by following the official instructions.
Avoid running it just from the Downloads folder!
Note that, for dragging of files and folders, you need to hold down the COMMAND key.
This will ensure AppTranslocation1 is avoided.
Blender on Arch Linux
Arch Linux users and users of other Arch based or similar rolling release distros are advised to use the official Blender builds.
The Blender package in the Community repository does not supply its own Python, and does not follow official recommendations.
As a consequence, the system's python version may not work with MESHmachine.
Latest MESHmachine
The latest version of MESHmachine is 0.11.2 - available on Gumroad and Blender Market.
See this page the learn what's new in the latest versions, or see the changelog for the full release history.
Updating
Plug Backup
Attention
If you are updating from a previous version, you are at risk of loosing any Plugs you may have created.
If you have not chosen a plug assets location outside the MESHmachine folder in Blender's addons folder, you should backup your plugs as described in the video, and outlined below.
Installation
The same instructions as in the video, but in text form:
1. Fresh Installation
NO previous version of MESHmachine installed
- start Blender, bring up preferences
- switch to the Add-ons tab and click the Install... button at the top right
- locate the downloaded MESHmachine_0.12.0.zip file and double-click it
- activate the addon by ticking the checkbox
- ensure your preferences are saved (by default done automatically)
- close preferences and in the 3D View press the
Ykey to bring up the MESHmachine menu
2. Update Installation
previous version of MESHmachine installed already
2a. Update Installation in the File Browser
Attention
Never install MESHmachine in Blender's program folder.
On Windows, that would be C:\Program Files\...
MESHmachine needs write access to its installation folder, so you need to install it into Blender's addons folder.
- with Blender closed, navigate to Blender's addons folder
- find MESHmachine, and copy the MESHmachine/assets/Plugs folder to a save location to backup any custom Plugs you may have created
- remove the MESHmachine folder
- in your Downloads location, extract the MESHmachine_0.11.2.zip file
- copy the MESHmachine folder from the zip file to Blender's addons folder
- note, if you have a MESHmachine_0.12.0 folder after extraction, don't copy this one, instead copy the MESHmachine folder contained in it
- start Blender and check if the menu (
Ykey) comes up
2b. Update Installation in Blender
- start Blender, bring up preferences
- switch to the Add-ons tab and use the search input at the top right to find your currently installed MESHmachine version
- unfold MESHmachine, go to the Plugs tab, and shift click on the folder icon of the assets path
- in your filebrowser copy any custom plugs you may have to a safe location
<!--- DO NOT click on the Remove button just yet-->
- back Blender, first deactivate MESHmachine, then click the Remove button
- with MM uninstalled, click the Install... button at the top right
- locate the downloaded MESHmachine_0.12.0.zip file and double-click it
- activate the addon by ticking the checkbox
- ensure your preferences are saved (by default done automatically)
- close preferences and in the 3D View press the
Ykey to bring up the MESHmachine menu
Blender's addons folder
Addons Folder (in user scripts)
Linux: /home/name/.config/blender/3.3/scripts/addons
MacOS: /Users/name/Library/Application Support/Blender/3.3/scripts/addons
Windows: C:\Users\name\AppData\Roaming\Blender Foundation\Blender\3.3\scripts\addons
Depending on your Blender version, replace 3.3 accordingly.
-
Learn more about AppTranslocation. ↩