Blendulate
shortcut CTRL + B in edit curve mode
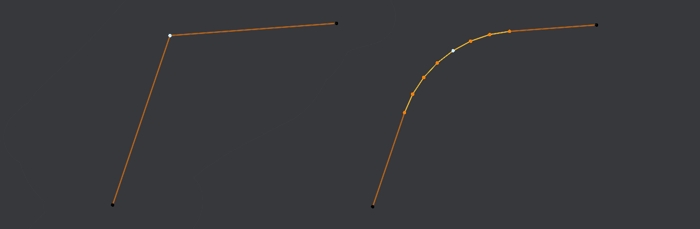
The Blendulate tool is used to create, edit or undo a curve radius or non-circular blend between two curve segments.
It's like a Bevel tool and MESHmachine's Refuse and Unf*ck tools, all in one, and for POLY curves instead of meshes.
Selection
 single point, and multiple continuous points
- a single POLY spline point
- multiple, continuously selected POLY spline points, without any gaps in between
- the spline of the selected points should be active
- the active spline's end points can only be selected if the spline is cyclic
Statusbar

The statusbar at the bottom of Blender - after invoking the tool - provides all the info you need in regards to what keys you can press to modify the tool's behavior.
Using Blendulate
- Dragging the mouse horizontally adjusts the Width of the blend
- You can drag to the left until the blend is Auto-Merged to a single point
- Holding down
SHIFTallows for more fine-grained control - Holding down
CTRLallows to quickly make bigger changes
- Using
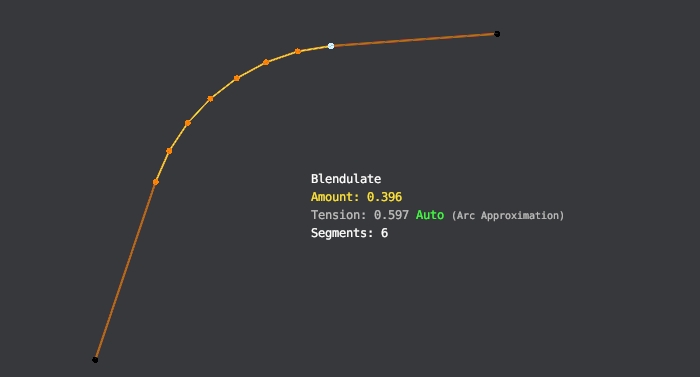
Ayou can toggle Auto-Tension, which will approximate a circular arc- this will only work if the curve segments at the end of the blend actually converge to a single point though
- Holding
Tallows you to manually adjust the Tension by moving the mouse vertically - Scrolling the mouse wheel or using the
1and2keys changes the blend's segment count - You can use
Mto toggle Merging without using mouse movement