Decals
Decals in the context of DECALmachine, are mostly single-polygon-meshes with a specific material applied, determening the decal type.
They are also called floating geometry and mesh-based decals.
Note
This is not to be confused with mixing textures and materials via multiple uv channels on the same objects, for which term decal is also sometimes used.
As of 1.4 there are 4 types of decals in DECALmachine:
- subtractor decal (decals01)
- subset decal (decals02)
- info decal (info01)
- panel decal (paneling01)
All four categories are saved in 2 locations:
Supplied decals are decals bundled with DECALmachine.
They can be found in the DECALmachine/assets/Decals library.
User Created Decals are decals created by yourself via the Decal Creation tools.
They can be found in the DECALmachine/assets/CustomDecals library.
All of the supplied and generated Decals have a displace modifier applied. This ensures, that decals snapped to the faces of underlying geometry are always floating above - just enough to avoid z-fighting, but not enough to be noticeably offset.
All decals are alpha mapped and can be previewed in Blenders material view. I recommend using MACHIN3tools Shading Switch, if you tend to switch between solid and material views often, as I do.
Parallax
All normal mapped decals(except panel decals) are also parallax mapped1, which provides a tremendous depth effect, while being quick to render and without relying on additional geometry as would be required for displacement.
 parallax magic
Note
Parallax mapping can be turned on/off per decal as well as globally for all decals in a scene, using the extra options in the pie menu.
Tip
Work in or switch to perspective viewport (Numpad 5) when previewing parallaxed decals in the RENDERED view. The orthographic viewport has issues with the parallax mapping and displays it distorted or inverted.
The orthographic camera does not have this issue, so you can still use ortho views in your final imagery.
Keep in mind
All decals - with exception of info decals - use a specific grey, smetallic base material by default, which is also automatically applied by Decal Project and Decal Slice to a target object, if it carries no material. There are also tools provided to deal with changing decal materials to something other than this default base material. Remember, that they all need to be based on the Glossy or Principled shaders.
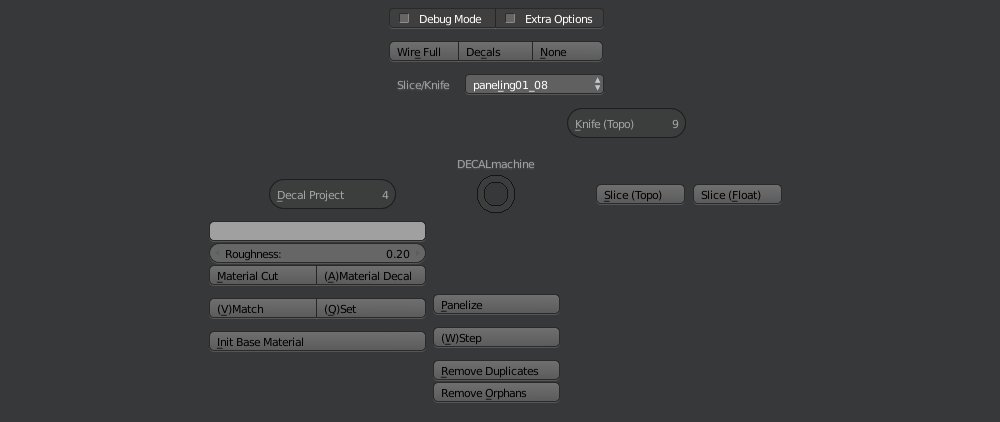
The Pie Menus
DECALmachine
DECALmachine tools are accessed using a pie menu mapped to the d key.
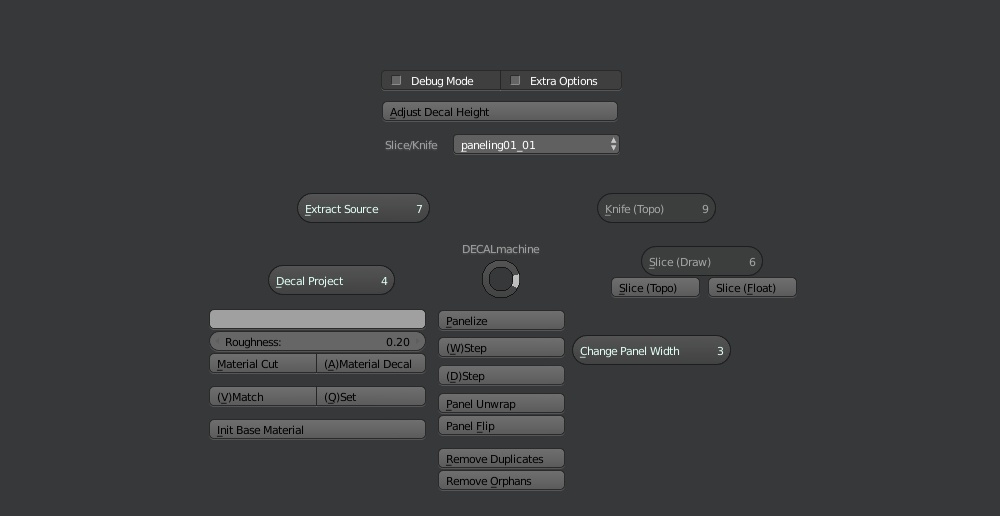 Mockup ignoring selection context and showing almost all tools at once
Context is important - what tool is available to you via the pie menu, depends on the amount or the type of objects being selected.
For instance, the Decal Project tool will only be available, if you select a decal or object to project and a second object to project on. The same is true for Slice and most of the other tools.
DECALcreate
There's a second pie menu for Decal Creation. Press ctrl + alt + shift + d to bring it up.
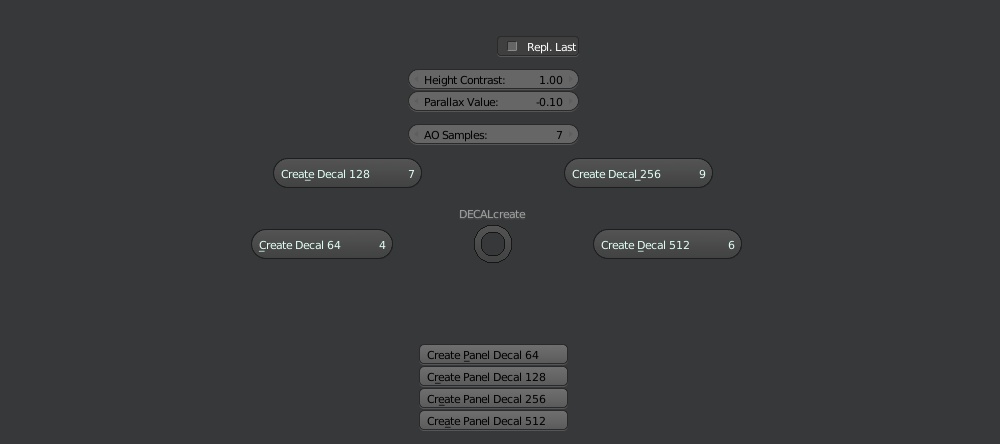 Instant Decal Creation via the DECALcreate pie menu
See the Decal Creation guide for details.
DECALexport
To access the tools to export Decals and decaled Objects press ctrl + alt + shift + e.
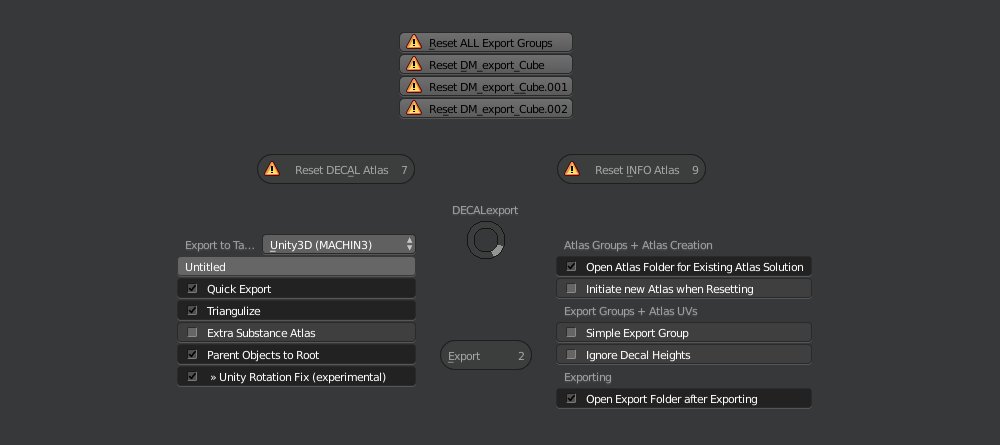 Preparing to export using the DECALexport pie menu
 The DECALexport pie changes in a DECALatlas scene to access tools focused on texture packing
GPencil
While not actually a part of DECALmachine itself, the GPencil pie tool palette is keymapped by DECALmachine to ctrl + d.

This provides access to all GPencil tools and avoids conflicts with default GPencil keymaps such as d or d q, which are otherwise unavailable after DECALmachine has been installed.
Shortcuts
On the following pages all tools are listed with shortcuts. Note however, that these shortcuts are not actually keymapped, unless they appear in the preferences.
Instead, they are key-press-sequences resulting from the way (pie)menus can be navigated in Blender.
If you are ever in doubt about a shortcut, just bring up a pie menu, such as the main DECALmachine pie by pressing d. This is the first keypress of the sequence.
While the pie is open, look for the underscored letters in the labels/buttons. These are the second keypress in the sequence.
Tools like (V)Match, (W)Step, etc. exploit this behaviour by putting a certain letter at the front and thereby forcing this very key to become the second keypress.
ds for Slice(Topo), df for Slice(Float), etc
Keep in mind
Pie menus can change depending on the selection and so the shortcuts may change with them.
For instance, with one object selected ds will start Slice(Draw), but with 2 objects selected ds will do Slice(Topo)
Operator Properties
Since DECALmachine 1.4 many DECALmachine tools have Operator Properties.
These can be accessed from the T-panel or by bringing up the so called F6 Panel - also referred to as Operator Panel or Redo Last Panel - after a tool has been called.
Changing any of the tool's parameters will cause Blender to undo the last action and redo the tool with the new parameter.
 'Topo Slice' Operator Properties
This allows for a more interactive way to use DECALmachine, especially in cases where you want to change the Projection Depth, Decal Height or Panel Width without having to use an addtional tool like Adjust Height or Change Panel With as a second step.
Asset Loaders
shortcut d (with nothing selected)
On a flat surface, all you need to do is drop a decal into the scene via the asset loaders and then position it accordingly. All snap settings are set up automatically, all that is left to do is holding down CTRL while the move tool g is active, to temporarily turn snapping on.
With nothing selected, the DECALmachine pie menu will show the asset loaders, used to quickly insert decals from the decal categories.
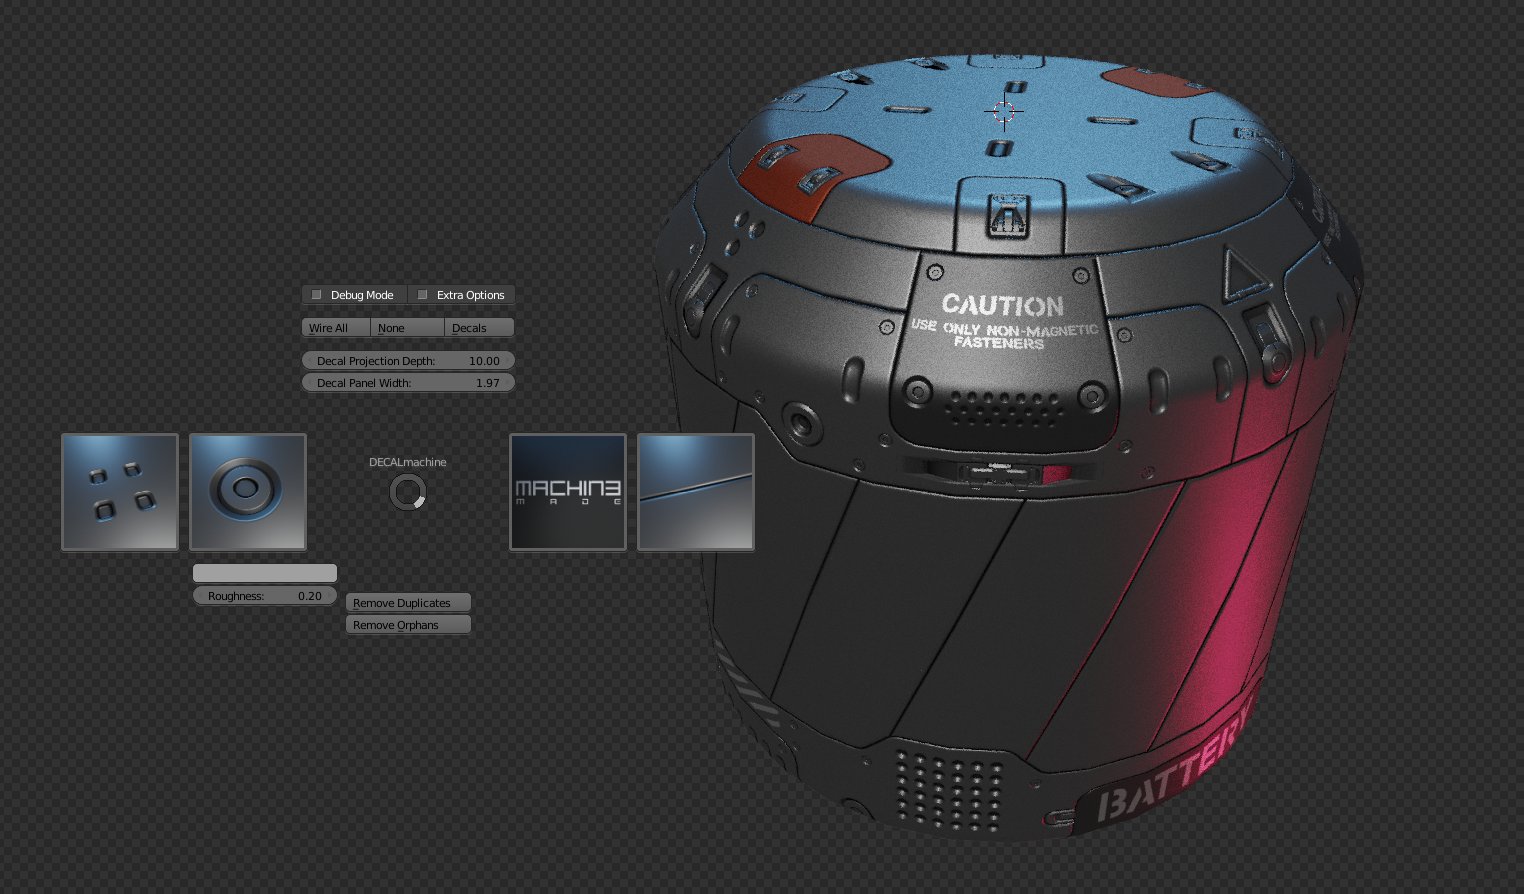 Deselect all using the
 a key and press d to open the DECALmachine pie menu with the decal asset loader.
From left to right, the categories are Subtractor(decals01), Subset(decals02), Info Decals(info01), and Panel Decals(paneling01).
Click a thumbnail to view all decals of a category and select one to insert a decal at the current cursor location.
Click the insert button above an asset loader to quickly re-import the most recently inserted decal of a category.
Tip
Place the cursor on the surface of an object, before inserting a decal! Decals will always be inserted at the cursor location.
-
Parallax nodetree ported by Vsevolod Ochinskiy and used with permission. ↩