
Atlas Groups
The first step in the export workflow is the creation of Atlas Groups.
Note
It is highly recommended to use the Batch Operations addon alongside, as it very nicely vizualizes groups and makes it easy to select them.
 initial state of DECALexport pie menu with the option to 'Create Atlas Groups'
To create Atlas Groups, select all the decals you want to export, bring up the DECALexport pie menu and choose Create Atlas Group.
Depending on the types of decals in your selection one or two groups will now be created:
- DM_atlas_decal
- DM_atlas_info
Tip
You can be lazy with your selection! Meaning, non-decals can be part of the selection and will be filtered out automatically. You can also just press a to selected averything visible.
So, in essence what Atlas Groups do, is sort decals by type.
Normal mapped decals from the categories decals01, decals02 and panelling01 are added to the DM_atlas_decal group and decals from the info01 category are added to the DM_atlas_info group.
You can update Atlas Groups by making a new selection and running what is now called Update Atlas Group in the DECALexport pie menu.
Warning
Do not attempt to manually add or remove objects to or from Atlas Groups. Under the hood, the groups carry important meta data, which will not be changed or updated unless you properly create and update the groups via the operators in the export pie menu.
For each of these atlas groups one Decal Atlas will be created in the next step.
Atlas Creation
With at least one Atlas Group created, the DECALexport pie will now provide the option to Initiate DECAL Atlas and/or Initiate INFO Atlas.
 'Initiate DECAL Atlas' and 'Initiate INFO Atlas' as Atlas Groups for both have been created previously
Initiating an Atlas will pack the decal textures in a single square image with minimal free space.
In the background, this is done by going through 3 packing algorithms combined with 3 ways to sort decals (by area, by width by height) and choosing the best of the resulting 9 packing solutions.
Once completed the Atlas will be visualized in a new Blender scene called DECALatlas.
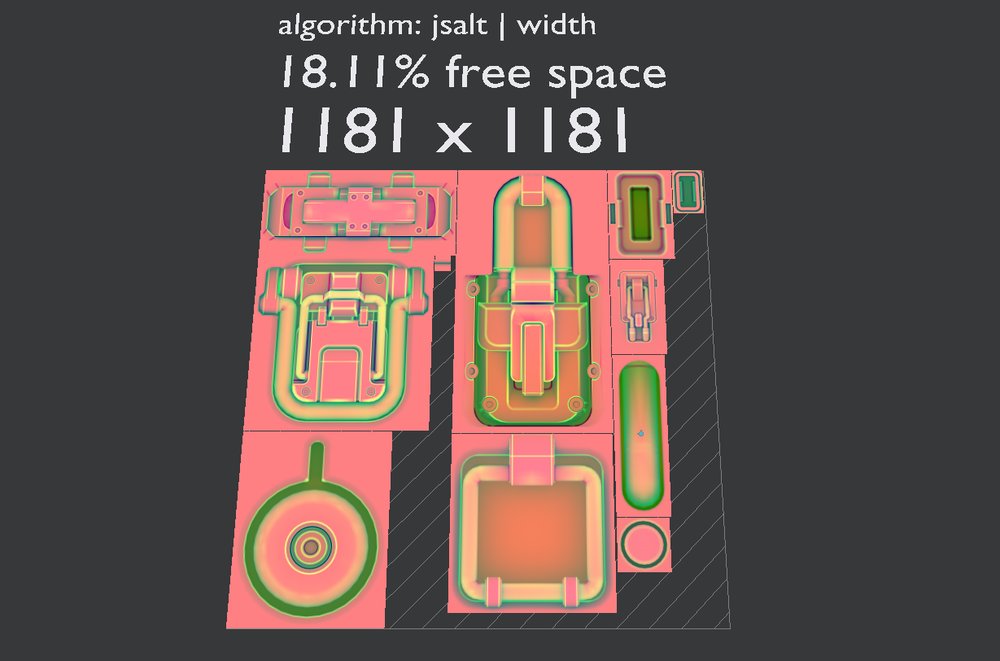 packing solution of a DECAL Atlas using the ao_curv_height maps of decals
Scaling Decals
This atlas vizualization is interactive. You can select a decal and scale it using Blender's scale tool, but you can't move or rotate a them.
The inital scale of each decal is determined by the texture resolution of each decal texture, which is also why you can't scale decals beyond 100%.
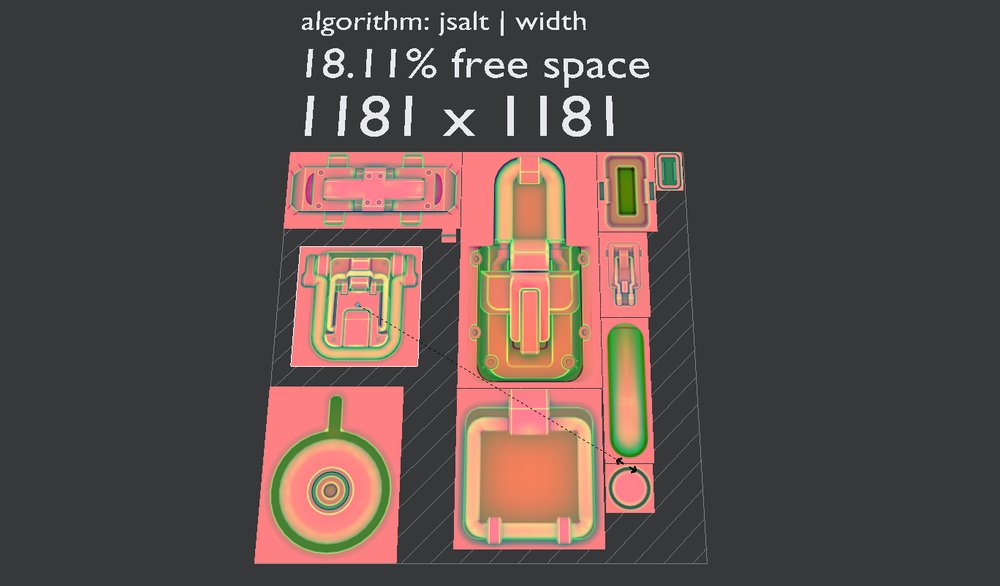 Scaling one of the decals down
If you have changed the scale of individual decals, you need to Re-Pack the Atlas.
This is done by bringing up the DECALexport pie menu, which in a DECALAtlas scene is populated with a different set of items.
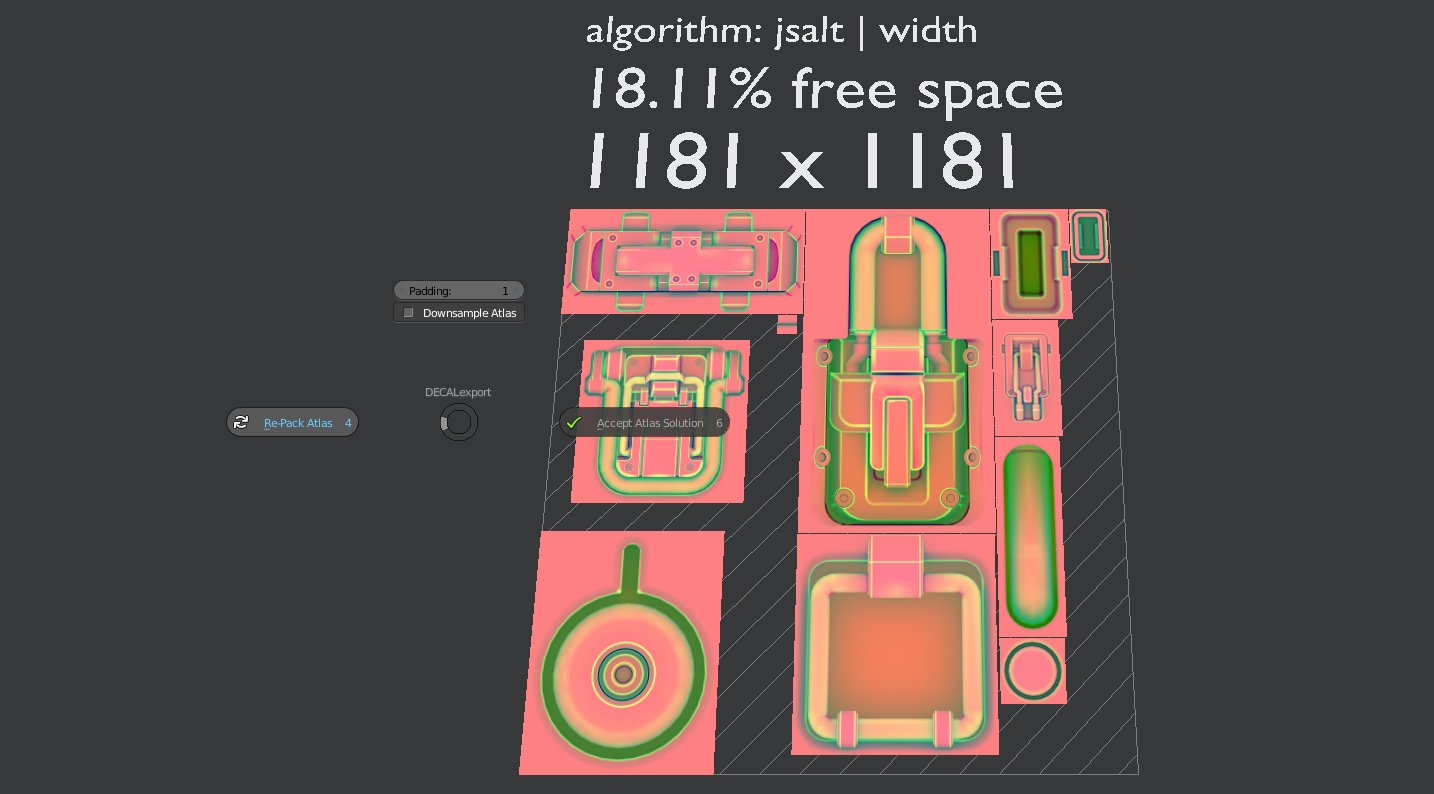 DECALexport pie menu in a DECALatlas scene
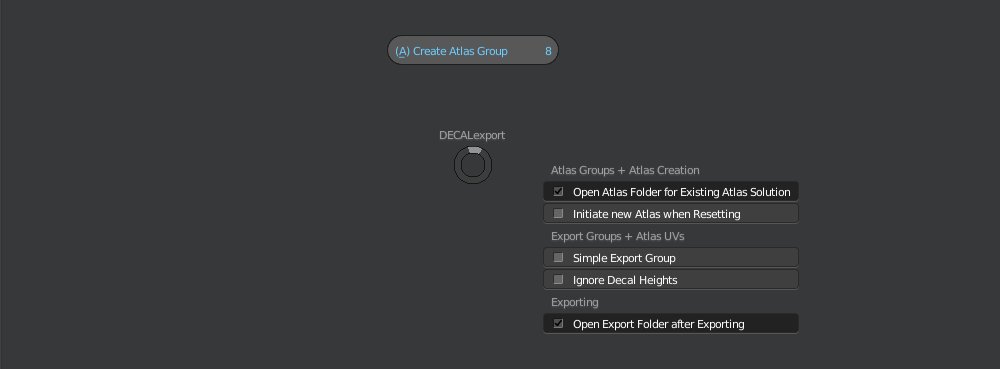
Padding and Downsampling
You also have the option to change the amount of Padding or to Downsample the Atlas.
Change the Padding number and Re-Pack to increase the space between decals.
This is usefull should you encounter texture bleeding once the textures are sampled from the Atlas in Unity/Unreal/etc.
With Downsample Atlas enabled, the Atlas will be scaled down to the nearest power-of-two resolution.
For instance, if your Atlas ends up having a resolution of 1134x1134px you can easily have it scaled down to 1024x1024, just by ticking that checkbox and doing a Re-Pack.
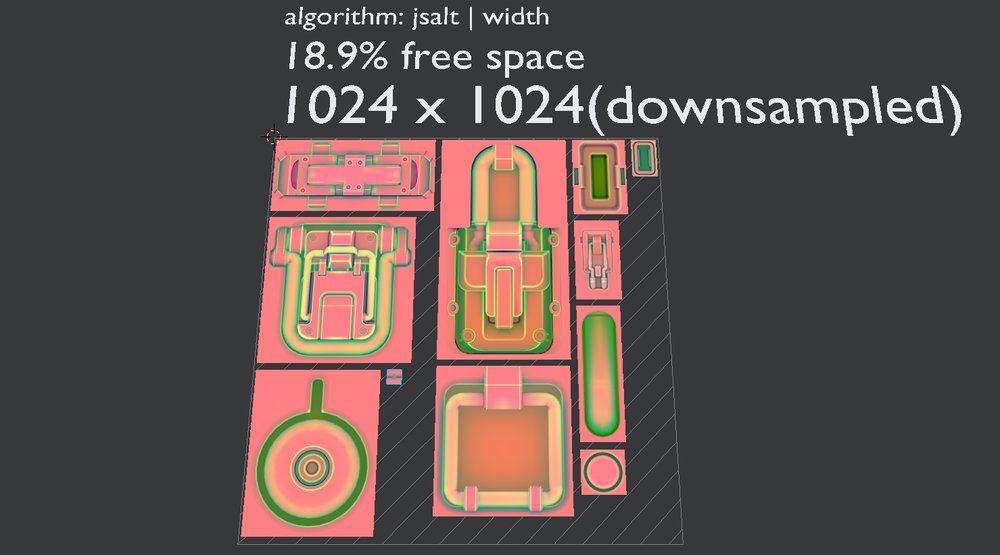 Re-Packed Atlas with padding increased and the Atlas downsampled to 1024x1024px
Once you are happy with the packing solution you can bring up the DECALexport pie and choose Accept Atlas Solution, wich will pack the as of yet unpacked maptypes - such as normals - and take you back to the Blender scene you've been working on before.
Your Atlas Group is now marked as packed internally and so the DECALexport pie now displays Reset DECAL Atlas in place of Initiate DECAL Atlas.
 the DECAL Atlas has been packed, the INFO Atlas hasn't
Use Existing Atlas
To avoid having to create a new Atlas for each new asset you do, you can create an Atlas, that includes all the decals you intend to use, and re-use the same packing solution and Atlas Textures for any number of assets.
To use a previously created Atlas on a new asset, choose Use Existing Atlas instead of initiating one from the export pie.
By default, your export folder will now be opened. In it you are expected to place the atlas .png's and .json's from your previous Atlas.
Note
You can turn off the automatic folder opening in the DECALexport pie menu.

Resetting an Atlas
Once an Atlas has been created or an existing Atlas is being used, the export pie provides the option to reset it.
Resetting an Atlas will mark the Atlas Group as unpacked again and so allow you to initiate a new pack.

If you have existing Export Groups that include decals making use of the Atlas your are resetting, those export groups will be reset as well.
There's an option in the export pie called Initiate new Atlas when Resetting for convenience.
If unchecked you have to manually initiate a new Atlas after resetting.