Please make sure you have the latest version installled.
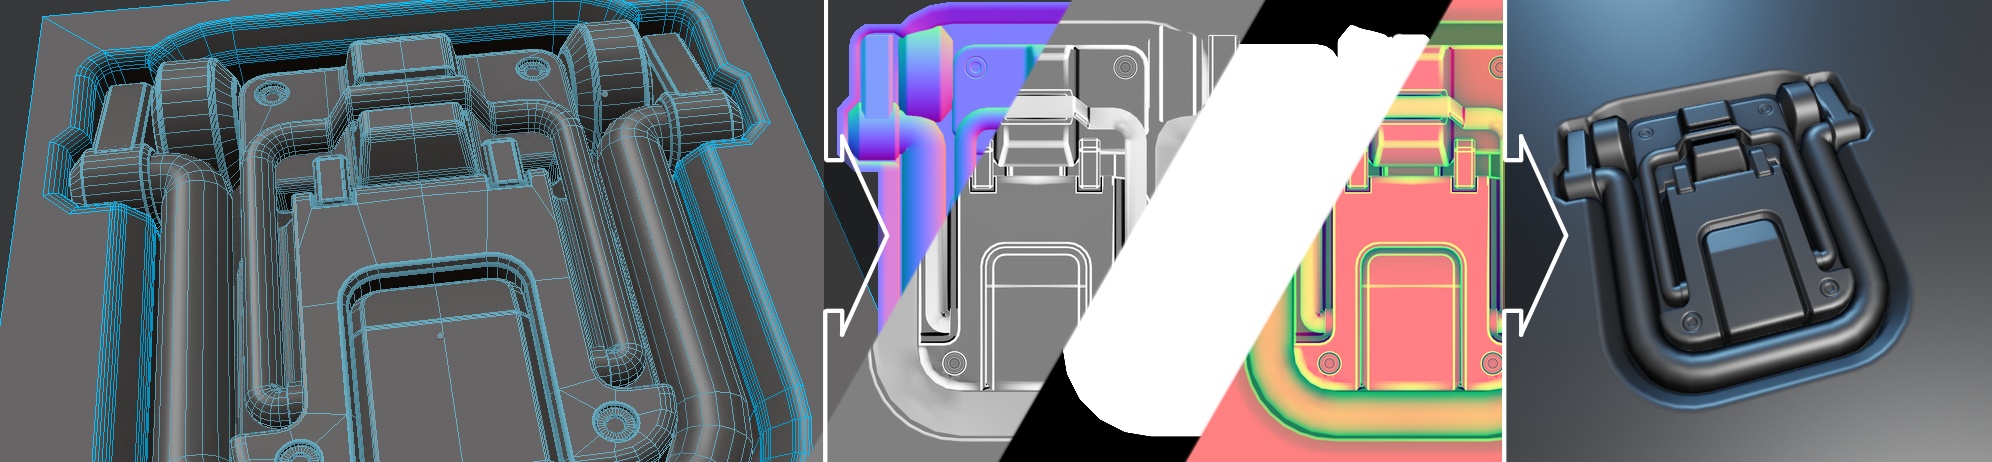
Instant Decals
immediate stay-in-blender Decal creation
Note
All user created Decals can be found in the 'assets/CustomDecals' folder.
Attention
For all instant decals you create, it is highly recommended to save the source blend files. You may want to go back and re-create or change a decal at a later point.
Process
- build your source geometry in Blender
- save the scene and select the object or objects you want to create a decal from
- bring up the DECALcreate pie menu using
ctrl + alt + shift + D - choose one of the Create Decal or Create Panel Decal pie menu entries - the number at the end is the resolution
A thumbnail will be rendered in the background and the decal blend will be saved. This usually takes around 5 seconds. Keep an eye on the terminal/system console to check on the progress.
Note
DECALmachine will decide if your decal is a subtractor(decals01) or a subset(decals02) based on the amount of meshes it can separate your geometry into.
Keep in mind
For info decals, follow the batch approach outlined below, even if you have just one decal.
Furthermore, try not to go over 99 decals per category for now.
Tip
Check out the sample source meshes in the assets/create/sources folder. As shown, 'crop' the base mesh tightly and avoid redundant height. You shold remove everythng that isn't contributing to the decal, such as the sides of a box or the underside of it.
Options
There are 4 settings you should be aware of when creating Decals, all accessible directly in the DECALcreate pie.
1. Repl. Last
Be very careful with this one, as 'Replace Last' will overwrite the last decal in the category, the to-be-created decal will be saved to. Never, should you turn this on, the first time you bake a new decal, as this will overwrite a previously successful decal and its textures. Turn it on only on the second run of a new decal, if you want to change one of the other settings or change the source geometry itself.
Having 'Repl. Last' checked, will prevent failed decals accumulating in your decal library.
2. Height Contrast
The default value of 1, will keep the contrast of the height map as it is when baked by Blender. A smaller value will decrease the contrast - decreasing the value range - and a bigger value will increase the value range. The bigger the value range, the bigger the depth effect of the parallax node.
3. Parallax Value
Each parallax node has a value, the determines the strength of the depth effect. At 0, there is no parallax effect at all. The smaller the value the bigger the UV offset that creates the depth effect.
So, to summarize, 'Height Contrast' and 'Parallax Value' are both used to control the parallax depth.
4. AO Samples
This controls the smoothness and noise level in the Ambient Occlusion bakes. The default value in Blender is 5, but I've found that too noisy especially for small decal resolutions, so I've set a default of 7 for Decal Creation. For the bigger resolutions you can lower it to 5 with no noticeable difference in quality. The more samples you use, the smoother the back, but also the longer the render times will be.