Align Pie
shortcut ALT + A in edit curve mode
The Align Pie is used to quickly and precisely align selected curve points.
It looks and works just like the Align pie in MACHIN3tools, except here in CURVEmachine it works on POLY and NURBS curve points.
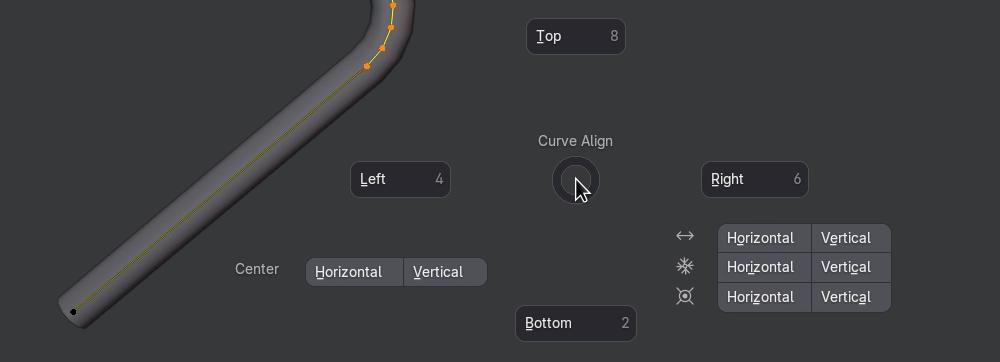 The CURVEmachine Align pie invoked via
 ALT + A by default
Note
As in MACHIN3tools, the direction is chosen in view space, but then projected into the chosen 3d space - the object's local space by default.
Selection
- one or more selected POLY or NURBS curve points
Using Align Pie
Align Right, Left, Top, Average Vertically, Center Horizontally + Clean Up + Symmetrize + Blendulate
Keep in mind
Average / Zero / Cursor aren't Min/Max alignments so they only need to know whether you want horizontal or vertical alignment - again in view terms, but it gets projected on the most aligned 3D space axis.
Same with Horizontal/Vertical Centering, where your selection gets shifted so that its midpoint sits on the chosen axis.
Aligment Methods
- Pick Left, Right, Top or Bottom to align the selection to the min or max of that view-space direction
- Use Average, Zero or Cursor with Horizontal or Vertical to average, zero out or align to the cursor along that view direction
- Use Center Horizontal or Vertical to shift the selection so its midpoint sits on the chosen axis
Alignment Space
By default, alignment happens in local (object) space.
But you can:
- Hold
ALTwhen picking an option to align in world space - Hold
CTRLto align in cursor space
Or switch the space afterwards in the redo panel: